Appointment Slots allow you to list available dates and times on a public calendar, so that current and prospective clients can request a scheduled session, if the provider has the feature enabled. For a good overview of this feature, please see the video recording of a webinar we hosted on this type of virtual clinic.
This support article goes over the process for requesting a session from a provider's available time slots.
You may also be interested in:
1. Visit the provider's booking page.
- If the provider has a listing, use the "Book Appointment" button on it.
- If the provider has branding enabled, the booking page is their custom custom domain with "/book" at the end. (e.g., https://demo.securevideo.com/book )
- If the provider does not have branding enabled, the booking page is a unique URL found in their account.
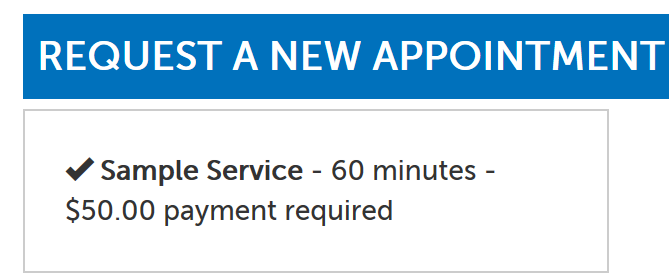
2. Select the Service for which you would like to make an appointment. (If there is only 1 choice, it will be selected for you.)
3. Click on a date to view times available for it. (Dates with a blue background have at least 1 available time slot.)
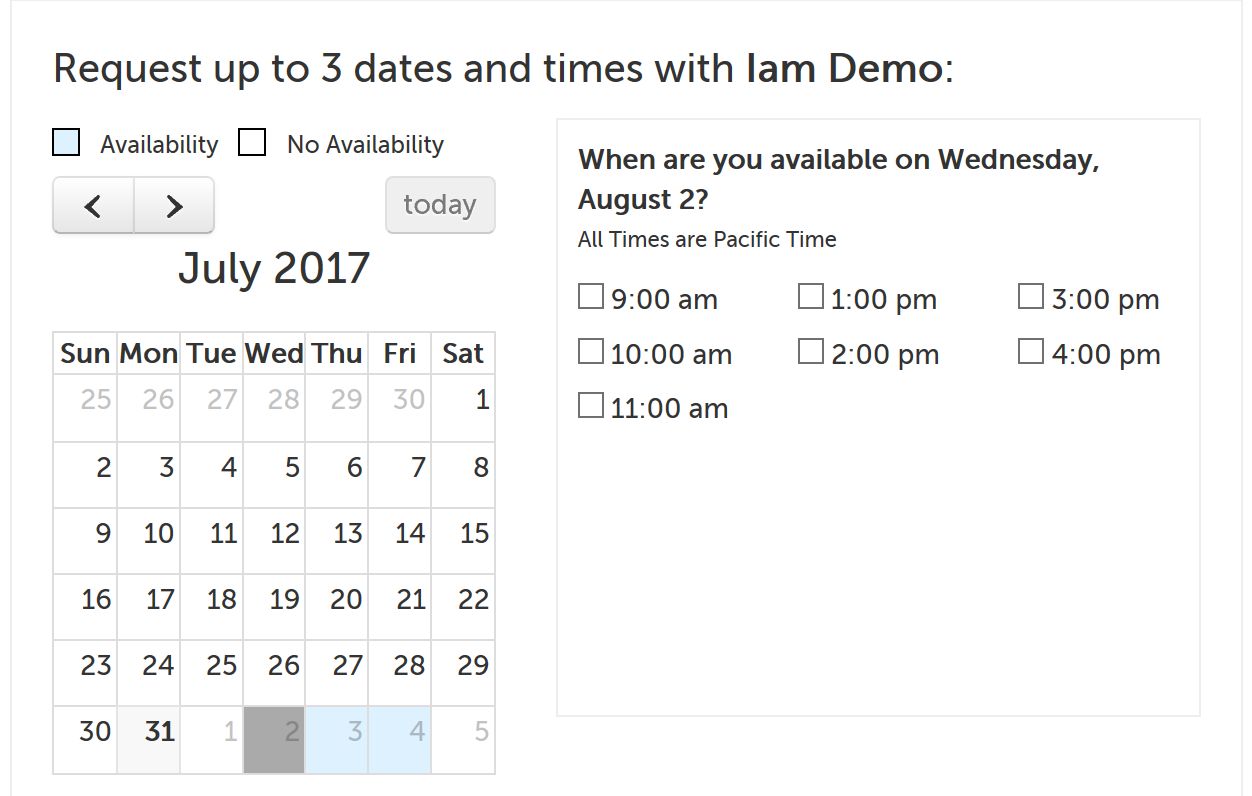
4a. Check the box next to a time slot to select it, and it will appear below the calendar as you click into other dates.
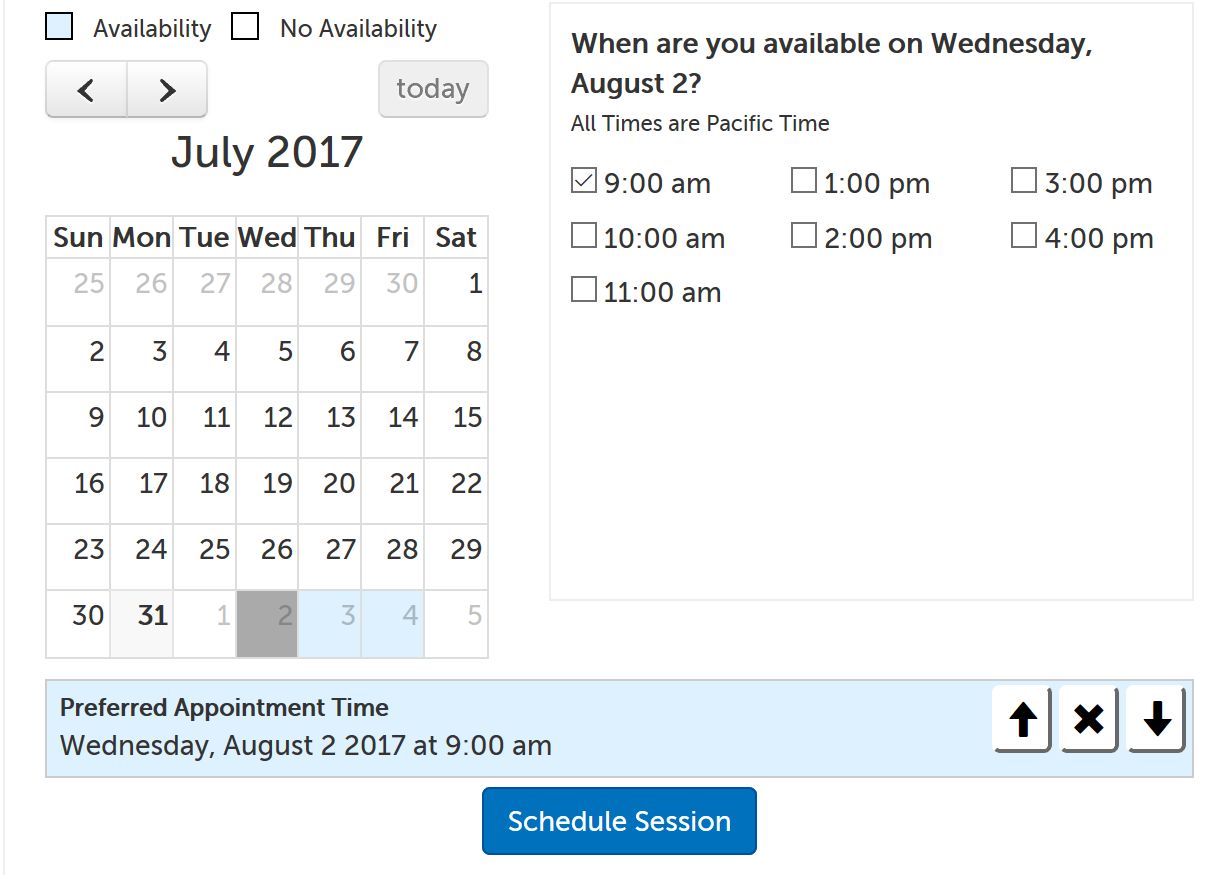
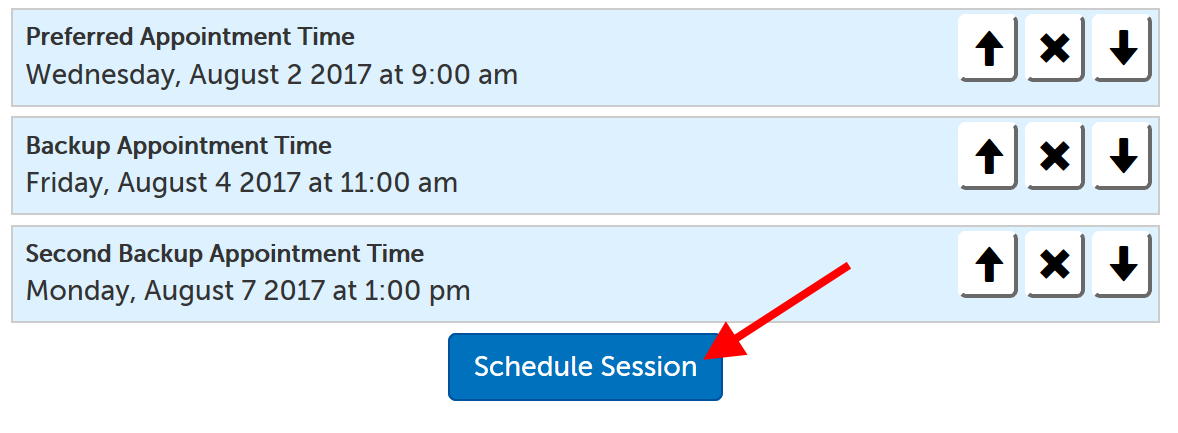
4b. You can select up to 3 different dates/times to request, which can improve your chances of having one scheduled. You can change the rank for any one choice (by clicking on the upward or downward arrow), or remove it altogether (by clicking on the "X"). When finished, click "Schedule Session".
5. You will be required to register to continue. You will be asked to enter:
- Name
- Email address
- Time zone
- Phone number
- Password
- Will need to fit these requirements: at least 20 characters, with at least 1 uppercase letter, 1 lowercase letter, 1 number, and 1 special character: !, @, #, $, &, or *
6. Click the "Save" button to continue.
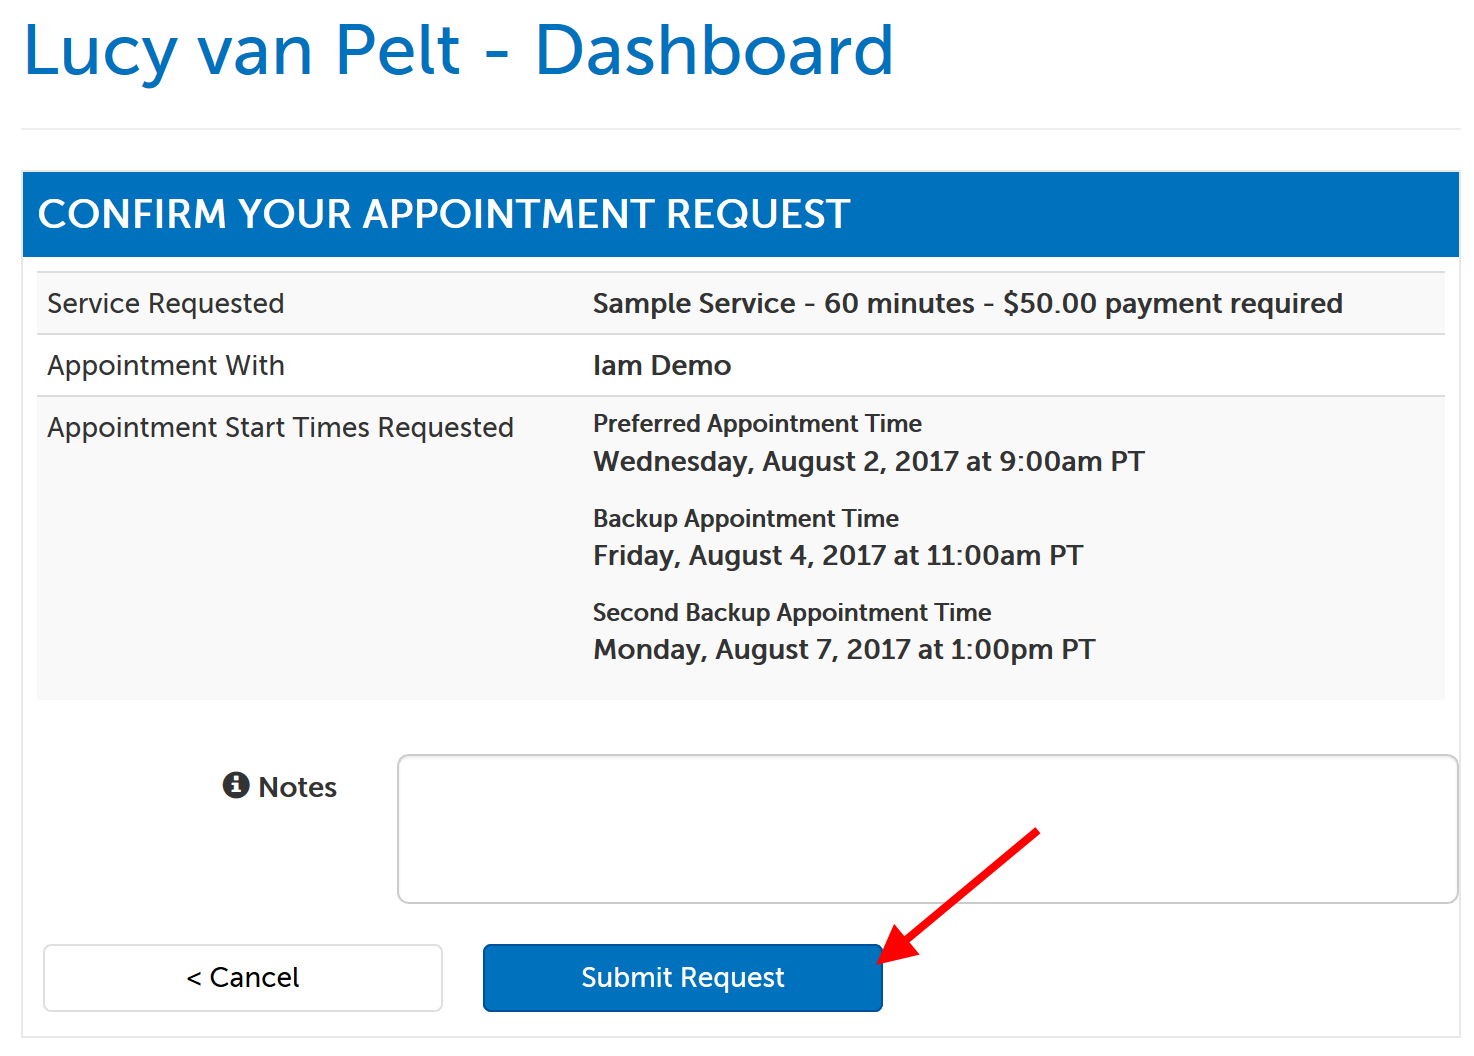
7. Review your selected times and enter any notes you would like to include with your request. Click "Submit Request" when ready.
- In the below example, we have a field called "Notes", but your provider may have more specific questions on their calendar for you to answer before submitting your request.
8. If the provider does not require a payment for booking, you will see a confirmation message that your request has been submitted, and will wait for an email update from the host. If the provider does require a payment for booking, click "Enter Credit Card" to continue.
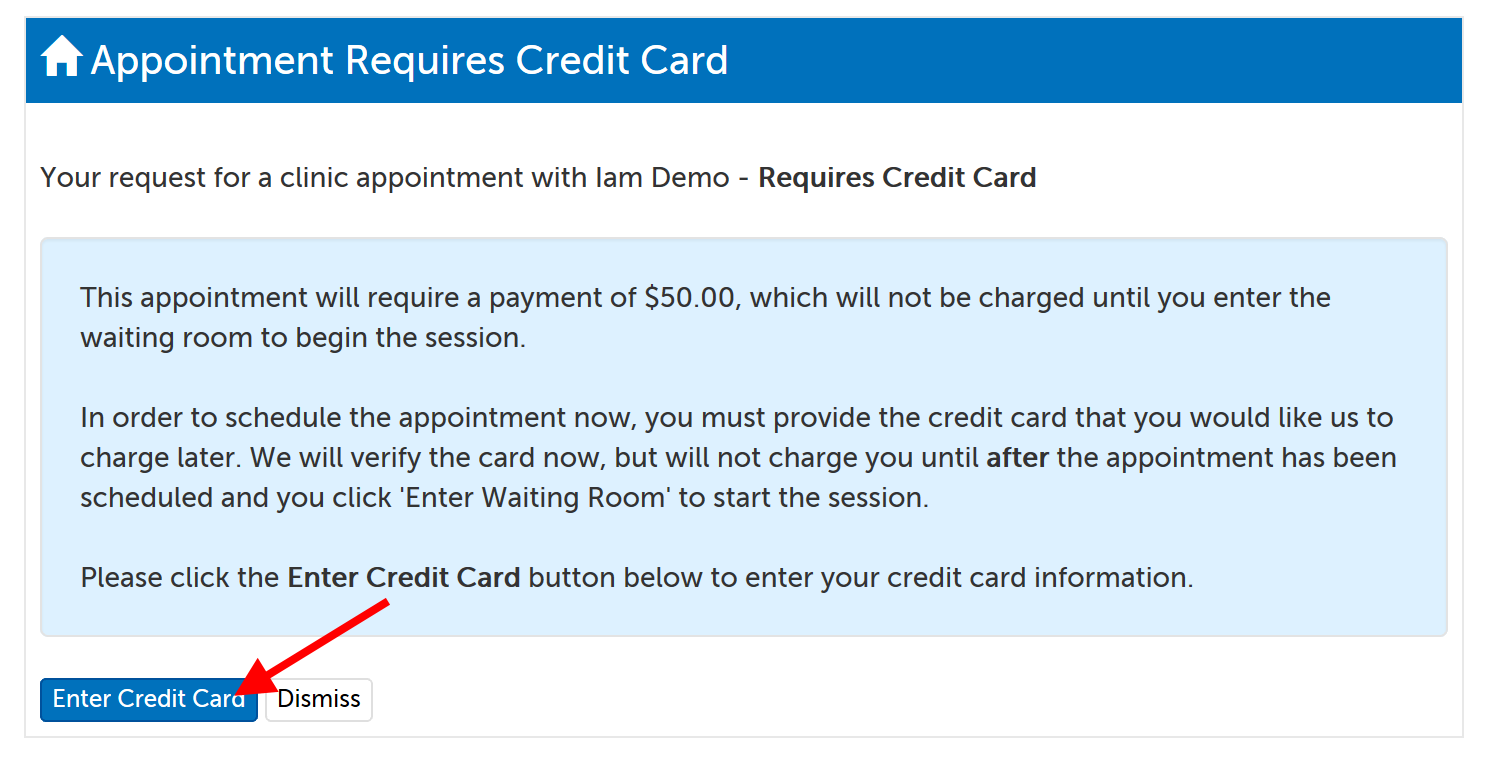
9. Enter your credit card information on the next page. Although we will verify the card when entered, you will not be charged until after the appointment has been scheduled and you click "Enter Waiting Room" to start the session.
This article was last reviewed by our Support team on July 30, 2017.