SecureVideo has HIPAA compliant cloud recording as a premium feature. To request pricing to enable (or to disable) the recording feature on your account, please contact our Support Team at [email protected] .
This support article illustrates how you can delete a session recording (if you have permission to). If you have view-only permissions, you will not be able to delete the recording.
You may also be interested in:
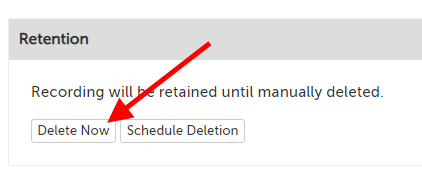
Delete Now
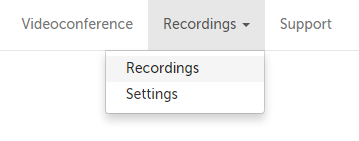
1. Click on the "Recordings" tab and select "Recordings" from the drop-down menu.
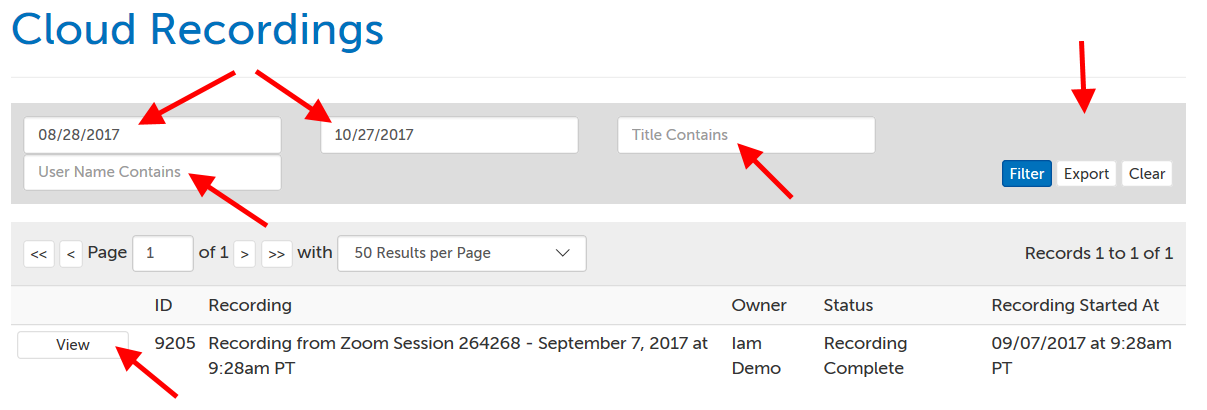
2. Any recordings created in the last 60 days (that you have access to) will automatically appear on the next page.
- Change the Start and End search dates to look for recordings made in other time periods.
- Title Contains: Search for specific text in the title of the recording. (Most useful when you have edited the title of the recording to be different than the default title.)
- User Name Contains: Search for a specific user or partial match on a user's name.
- Filter: Re-run your search with your newly selected parameters.
- Export: Export your search results as an Excel spreadsheet.
- Clear: Clear your current search paramenters.
- View: View a specific recording.
Use the "View" button next to any listing to open a recording for viewing, or use the search function to find any other recordings. You can search by recording owner (the user that hosted the recorded session) and/or the date range in which the recording was created.
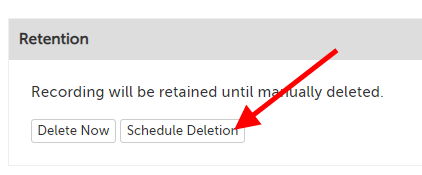
3. On the next page, scroll down to the bottom of the page to the "Retention" section. This will have a description of the current retention policy applied to the recording. (By default, all recordings are kept until deleted, unless your organization has a retention policy in place to automatically delete recordings after a certain period of time.) Click "Delete Now".
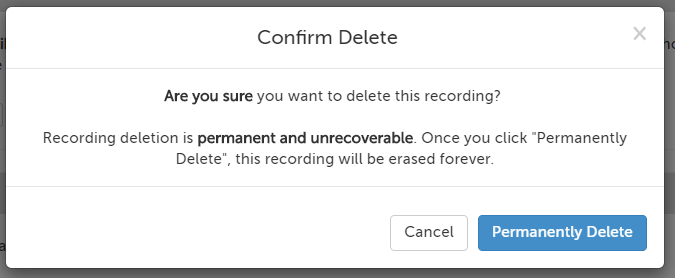
4. A confirmation message will appear asking if you are sure you want to permanently delete this recording. Click the "Permanently Delete" button to proceed.
5. The recording will be deleted, and you'll be returned to the main Recordings tab.
Schedule Deletion
1. Click on the "Recordings" tab and select "Recordings" from the drop-down menu.
2. Any recordings created in the last 60 days (that you have access to) will automatically appear on the next page.
- Change the Start and End search dates to look for recordings made in other time periods.
- Title Contains: Search for specific text in the title of the recording. (Most useful when you have edited the title of the recording to be different than the default title.)
- User Name Contains: Search for a specific user or partial match on a user's name.
- Filter: Re-run your search with your newly selected parameters.
- Export: Export your search results as an Excel spreadsheet.
- Clear: Clear your current search paramenters.
- View: View a specific recording.
Use the "View" button next to any listing to open a recording for viewing, or use the search function to find any other recordings. You can search by recording owner (the user that hosted the recorded session) and/or the date range in which the recording was created.
3. On the next page, scroll down to the bottom of the page to the "Retention" section. This will have a description of the current retention policy applied to the recording. (By default, all recordings are kept until deleted, unless your organization has a retention policy in place to automatically delete recordings after a certain period of time.) Click "Schedule Deletion".
4. Click the button next to "Delete on a specific date", and then enter a date in the field next to it. (If you click into the field, you can also use the date picker pop up.) Then click "Schedule Deletion" to save.
![Schedule Recording Deletion message; options: "Delete according to your retention policy: retain until manually deleted", "Delete on a specific date: [blank]", "Retain until manually deleted", and two buttons: "Cancel" and "Schedule Deletion"](../../Resource/Permanent/Screencap/00/0000/000000/00000003/Screencap-312-004_18C6FDF7187A726E444B480DFBA91A316C0248B280E967D6E8A04431A5FA4D25.png)
This article was last reviewed by our Support team on February 15, 2021.